Thursday, February 10, 2011

Self Heating Milk Bottle


They said bringing a few months old baby to go traveling is a stressful event to the parents. Partly because not only you have to bring a big stroller out, but also have to prepare lots of necessary things for the baby. For instance, preparing milk for the baby. Imagine you are in public areas, it's just a hassle to find hot water to prepare the milk.

But fret not! Thanks to the technology these days, we now have a self heating milk bottle! 


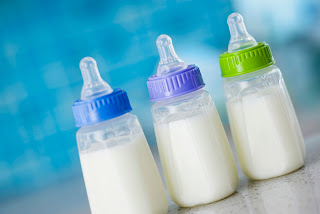
The iiamo Go designer milk bottle

iiamo Go allows you to heat up your baby’s milk in just 4 minutes, whether you are in your car, on the plane, at the cafĂ©, beach, park…with an iiamo feeding bottle, there are no boundaries.  iiamo Go is designed by world renowned Karim Rashid, who is famous for his designs for Prada, Georg Jensen, Audi, Sony, Ralph Lauren, Lacoste and many more

Key Features and Benefits:
· Bisphenol-A (BPA), polyvinyl chloride (PVC), lead and phthalate free.
· Heats up the milk to 37 degrees in 4 minutes without the use of batteries nor electricity – just an organic heating cartridge.
· Heating cartridge contains no chemical – a 100% organic heating cartridge that only contains salt and water.
· iiamo go is tested and approved by Forbrugerlaboratoriet, security group A (the best category).
· iiamo teats have a built-in anti-colic ventilation system.
· Compatible with some other brands' standard size teats.

iiago warm: the warmer cartridge

Totally Organic, totally Cool, totally Disposable, totally Lightweight and totally Portable, this cone-shaped cartridge warms the iiamo bottle content in just 4 minutes to 37 degrees celcius! Super cool (ahem..."warm") in both looks and function, at a simple twist after fitting into the cartridge chamber in the iiamo bottle, the salt and water content in the warmer simply mixes naturally to release natural heat to warm up the milk. One-time use only. 


Thank you and enjoy! 


Sunday, February 6, 2011

Fun Activity For Children : Floating & Blossoming Paper Flowers

This was one of the many activities that I did with my niece last year. It is easy to prepare and is guaranteed to be truck loads of fun for you and the little ones! All you need is:-
 o   Paper (the colourful the better)
 o   Pencil, scissors & glue
 o   A bowl of water
 o   and of course your kid’s pair of chubby little hands to assist you!
But, before I delve into the whole process-making, allow me to digress a little to share with you the inspiration behind this activity.
Last semester, I had “Science for Young Children” as one of my subjects for the Diploma in Early Childhood Education course that I am currently undertaking. We were taught that in order to teach science to young children effectively, we have to create stimulating and engaging activities for them to partake; activities that piques their curious little minds and above all else, meets their needs so as to help them understand and discover their surrounding world.
I aimed to put what I learnt into practice. So, I pored over some books and came across this activity that I thought will interest my niece tremendously since she is in this “I-like-flowers-because-they-look-pretty-on-my-hair” phase. So what better way to integrate some science learning into her evening play time with making floating & blossoming paper flowers!
So, this is what you need to do. (Have the kids to join in the fun. Not only will they enjoy cutting, pasting and folding but they will be working out their little muscles and fingers! For kids who are not confident or ready to cut on their own, your assistance would be required).
1.     Cut out the paper into squares. Better yet, if you have origami paper, you can skip this step altogether.
   
2.Then, fold the paper in half, then in half again. Draw a petal shape
coming from the folded corner. It should look something like this. Then, cut it out
 
3. Open up the paper to reveal a 4-petaled flower. Cut paper circles
(preferably of a different colour than the paper flowers) and glue them on the center of the flowers

4. Then, fold the tip of each petal into the center of the flower, like this


5. Finally, fill a bowl with water and have the kids drop the paper flowers on the water
and witness the floating paper flower “blossom” before your very eyes!

My niece enjoyed the whole process of making her own paper flowers. Firstly, she was intrigued that a folded piece of paper when cut “changed” into a flower. Then, when she placed the flower into the water, she burst with such great excitement and enthusiasm when the flowers opened. Questions after questions rolled out of her tongue as she tried to comprehend how the paper flowers could open by themselves. So I tried to explain to her in the simplest form that paper is absorbent and thus, water can soak into it. As the paper flower absorbs the water, the paper swells, forcing the paper petals to open.
That day, our “growing flowers” session (as my niece calls it) lasted for a whole hour. In fact, she wanted to extend it but I had to cut it short as it was time for dinner.
I must admit that the big grin on her face and her many shots of laughter that day was simply priceless and I think that is what every aspiring teacher (like myself) wish to see in their students’ faces after an activity.
A child's smile brightens up your day in an instant doesn't it?
Looking back now, I think it is safe for me to say that my endeavour to apply what I learnt from class into practice was a great success. I was able to teach my niece the science concept of water and its properties all under the pretext of “playing”. In fact, she still requests to “grow flowers” now and then; and I have to say, her understanding of it all gets better and better each time.
So, this is my verdict: TEACH CHILDREN THROUGH PLAY. THEY LEARN BEST THROUGH PLAY & IT BRINGS OUT THE BEST IN THEM .
Go on, give this a try TODAY!!! You and your kids surely would not be disappointed J


Saturday, February 5, 2011

Friday, February 4, 2011

Technology in the classroom.

Dear readers, do you still remember what kind of board your school used when you were young?
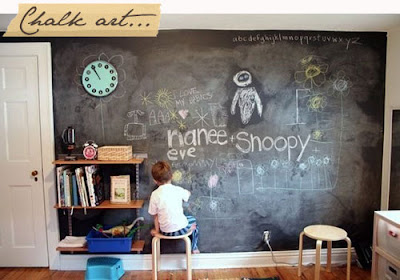
For most of us, I bet it was the infamous chalkboard or blackboard.

Remember this? The board that uses chalk to write on and produces lots of white dust.


After that, when I entered high school, my school no longer used the chalkboard.
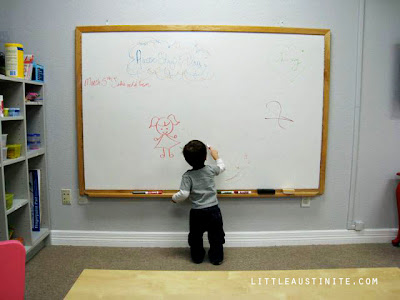
We used the whiteboard.


This board uses marker pen to write and produces no dust at all which is more convenient for the teachers. 

Not long after, they came up with the glass board.

It is basically a piece of magnetic glass that allows you to write things on it. 

And now, let me introduce you to the SMART Board.


What is a SMART Board exactly you may think?


Well, the SMART Board is an interactive whiteboard that uses touch detection for user input – e.g., scrolling, right mouse-click – in the same way normal PC input devices, such as a mouse or keyboard, detect input. A projector is used to display a computer’s video output on the interactive whiteboard, which then acts as a large touch screen. The SMART Board typically comes with 4 digital pens, which uses digital ink and replaces the traditional whiteboard markers.


The SMART Board interactive whiteboard operates as part of a system that includes the interactive whiteboard, a computer, a projector and white boarding software called SMART Notebook collaborative learning software. The components are connected wirelessly, via USB or serial cables. A projector connected to the computer displays the computer’s desktop image on the interactive whiteboard. The interactive whiteboard accepts touch input from a finger, pen or other solid object. 


Here's a video that I would like to show all of you about the SMART Board: 


NOW, ISN'T THAT SMART!


Sunday, January 30, 2011

Self esteem

I had the privilege of teaching so many different children during the course of my teaching. It was a big challenge for me as they were all unique and had different interests & needs. Here are some snapshots of my experience:-

1.    A four year old Italian girl came into my class with her pacifier. Her mom informed me that it should be taken off during class but the child insisted on keeping her pacifier in her mouth.

      After three weeks of constantly reminding her to remove the pacifier, I finally decided to remove it from her mouth and kept it in her bag. She was so close to tears and was miserable the whole day. Nevertheless, I found her so adorable with the tears around the corners of her big green eyes. 

     The next day, I was so worried, thinking how she will be when she comes to school. Again, she had her pacifier. And again, I removed it. This lasted for the next three days. But, on the fourth day, she took it off by herself and asked her mom to keep it.

2.    A French boy has just scribbled his tree with black color. I told him that trees are mostly green, but can be brown or yellow and that he was supposed to color inside the line. I gave him a new picture of a tree to color and again, he coloured it black. So, I decided to colour for him and put it up on the wall.

     The next day, he asked me where was his black tree. I pointed to the tree that i coloured for him and the child said, “Oh no, Miss Ruby, that is not my tree!.” Seeing his disapointment, I pinned up his black tree up and there was instantly a smile on his face.

3.   An American girl with a speech impediment in my class love story telling. The children seated in the front row will usually move with excitement as they followed the story. This girl usually sat at the back row and I saw her attempt to tell her friends at the front row to stop moving around so much so that she can follow the story telling. But due to her speech impediment, she could not communicate this to her friends. So, she pushed or hit her friends at the front row.I can see her frustration when her friends did not understand her and I was trying to find a solution for her.  

     So, one day, before I started the story telling session, I asked her to sit on the chair at the back so that she can see well. She was quite reluctant at first but after seeing the comfort of having the best view without being interrupted, she eventually took the back seat without being told every time we had story telling.

Looking back, I really do wonder whether I made a positive impact in their lives & how many I have lifted up or crushed in terms of their self esteem.   

Have a date?

A mother of three recently told me that her husband will pick their daughters up after school and go on a date with them. I was puzzled as I have never thought you need to date your child.
The next morning, I asked the mother about this "dating your child" business.  They have two girls, age 4 and 7, and a year old baby boy. She told me that their father will have a date with each of their girls every time he comes home as he is usually travelling. They set a rule that there shall be no buying of things during these dates except on their birthdays. I asked her if she too went on dates with the girls. She said no but she will "date" her son when he is old enough.
She told me that they found this very effective as the girls will share with their father things they won’t say to her. She also said, the girls have a better communication and relationship with their father. She also added that what they are trying to do here was to be there for their children whenever they face any problem.
Inspired by this mother's story, I searched for information on how to build a positive relationship with young children. I came across the articles below and I found that in order to build a positive relationship with young children, you must first build on their positive emotions.
This drew me back to Erikson’s theory which states that during the first year of your children's lives, they go through the stage of trust versus mistrust. When children's needs are met consistently by their parents or caregivers, a sense of trust is developed. And when this sense of trust exists, a healthy attachment and relationship will be fostered.
To find out more, do read the articles below. They will give you a better a insight on how to develop healthy and secure attachments with young children.
Have a good read!

Saturday, January 29, 2011

My 1st year in teaching.

My six years working at Preschool Stepping Stone in Abu Dhabi was truly an eye opening experience. Back then, I had no clue of any child development theories, developmentally appropriate practices (DAP), milestones and practising professionalism while interacting with parents.
I found it extremely stressful speaking to parents. The expectations and requirements were sky high and I was not ready (mentally and emotionally) on how to handle them.  I felt I was not fit even to be an assistant teacher!
I remembered during my 1st year being an assistant teacher, a child was pulled out from my class . Her Canadian mother’s complaint was that I could not pronounce the word "water" correctly. The poor child cried for two weeks in her new class before her parents decided to put her back into my class. My heart was crushed when she sat crying at the door not wanting to go back to her new class, banging the door and begging to come in.  Worst, the rest of the children in my class begged that she should be let in.  Those children were only three years old. It was the lowest moment in my life.
Relating this to what I know now, Piaget’s theory on preoperational stage states that children are able to represent their world with word and images. This child has been familiar with her class, friends and surrounding for the last eight months. An attachment and relationship has been built; and to be put in a new place while your friends are just next door, this child was confused, felt abandoned and not knowing how to cope with the stress.
Looking back, I found that it is just not enough to teach young children with love and dedication. You need to equip yourself with information and knowledge on child development theories. Only then will you be able to bring out the best in them as well as yourself.

Friday, January 28, 2011

Education and the future of technology

This is a video I would like to share with all the parents, future parents, teachers and soon to be teachers in the world. I do not know how true is the information, but I do somehow believe in this video. The information actually make sense and this video makes me realize that technology actually plays a very important role in our future. Enjoy!


Thursday, January 27, 2011

Cute Doggie cookies

I came across this baking blog with such an awesome shape cute doggie cookies. Hmmm...ya ya..i know, it is the year of the Rabbit, but I can't resist not to bake this little cute thing. Plus, it has no sugar and egg! They don't only look cute, they taste great too!

 Ingredients:
adapted from Selby's Food Corner
200g butter
80g milo or ovaltine or horlicks ( Horlicks is the original flavour)
200g flour
25g corn flour
25g milk powder
 Fillings:
60g chocolate chips (or more)
20g cornflakes (crushed)


Toppings:
Koko Krunch (for the ears)
Chocolate chips (for the nose)
Chocolate rice (for the eyes)


Directions:
- Pre-heat oven to medium level (about 320 F)
- Cream butter till it becomes pale color
- Add flour, corn flour and milk powder then mix together
- Divide the dough into 10g each, flatten each piece of dough and add in the fillings (some chocolate chips and crushed cornflakes). Roll into balls. Note: If you like sweet, then you can be generous filling with more chocolate chips
- Decorate to make a dog's head feature. Insert 2 koko krunch to form the ears and chocolate chips in the center for the nose.
- Bake for 35 minutes or until golden brown
- Leave to cool
- Make the eyes with black food marker or 2 chocolate sprinkles
- Store in an air-tight container


Don't they just look too cute to be eaten? Children ( and adults) will be asking for more!

Happy baking everyone!